In this article we are going to build a React app to render historical stock prices.
We’ll use KendoReact’s ButtonGroup and Input components to gather user input, and StockChart to display the stock market data nicely.
If you follow along, you’ll have a cool little app that renders historical stock data in no time. Let’s start coding!
You can see the code to build the front end of this app on this GitHub repo.
Building a React app with Create React App
We’ll start building our app by creating a basic front-end using Create React App, a tool that allows us to have a React app up and running really quick.
We can create a new app in a folder called stock-chart-app by executing this from the command line:
$ npx create-react-app stock-chart-app
Now, let’s make that folder our current directory, and launch the app:
$ cd stock-chart-app
$ npm start
We can see our app running by browsing to http://localhost:3000.
The most important files that have been created are:
package.json, listing all the dependencies of our project.src/index.js, the entry point to our app.src/App.js, a sample view that we’ll edit to our taste.src/App.test.js, a sample test.
Great!
Installing KendoReact dependencies
KendoReact is a component library for building complex business UIs. We’re going to be using some of their components, so we’ll need to install the following dependencies:
$ npm install --save @progress/kendo-react-inputs \
                     @progress/kendo-react-buttons \
                     @progress/kendo-react-charts \
                     @progress/kendo-drawing \
                     @progress/kendo-react-intl \
                     @progress/kendo-theme-material \
                     hammerjs
Getting started
Our App component will act as the root of our application. We’ll keep the following three things in its state:
- The company’s symbol entered by the user.
- The date range to be displayed.
- The data fetched from the API call.
We’ll provide some initial values in its constructor:
// src/App.js

import React, { Component } from "react";

export default class App extends Component {
  constructor(props) {
    super(props);

    this.state = {
      symbol: "",
      range: "1m"
      stocksData: {},
    };
  }

  // ...
}
We’ll also render three components matching those three pieces of state:
- An
Inputcomponent to read the company symbol. - A
ButtonGroupcomponent to read the date range. - A
StockChartcomponent to render the data.
Our render method will look something like this:
// src/App.js

export default class App extends Component {
  // ...

  render() {
    const { symbol, range, stockData } = this.state;

    return (
      <div className="App">
        <SymbolInput value={symbol} />
        <RangeButtonGroup value={range} />
        <StockChart symbol={symbol} data={stockData} />
      </div>
    );
  }
}
Entering a company symbol with KendoReact Input
We’ll use KendoReact’s Input component to let the user enter the company symbol they want to view:
// src/SymbolInput.js

import React, { Component } from "react";
import { Input } from "@progress/kendo-react-inputs";

export default class SymbolInput extends Component {
  // ...

  render() {
    const { value } = this.props;

    return (
      <form className="k-form">
        <Input
          name="symbol"
          label="Company's symbol"
          pattern={"[A-Za-z-]+"}
          minLength={1}
          required={true}
          value={value}
          onChange={this.handleChange}
        />
      </form>
    );
  }

  // ...
}
The Input component allows us to do some pretty advanced validation. See how we’re using the pattern property with a regular expression to ensure that the user enters a valid company symbol? The onChange property won’t trigger until the user enters a valid value.
Handling that onChange callback is straightfoward:
// src/SymbolInput.js

export default class SymbolInput extends Component {
  // ...

  handleChange(evt) {
    const { onChange } = this.props;
    const symbol = evt.target.value;
    onChange(symbol);
  }
}
Selecting a date range with KendoReact ButtonGroup
We’ll use KendoReact’s ButtonGroup component to allow the user to select which date range they want to view:
// src/RangeButtonGroup.js

import React, { Component } from "react";
import { Button, ButtonGroup } from "@progress/kendo-react-buttons";

export default class RangeButtonGroup extends Component {
  // ...

  render() {
    const { value } = this.props;

    return (
      <div className="RangeButtonGroup">
        <ButtonGroup>
          <Button
            title="1 month"
            togglable={true}
            selected={value === "1m"}
            onClick={this.handleClickOneMonth}
          >
            1M
          </Button>
          <Button
            title="3 months"
            togglable={true}
            selected={value === "3m"}
            onClick={this.handleClickThreeMonths}
          >
            3M
          </Button>
          {/* etc */}
        </ButtonGroup>
      </div>
    );
  }

  // ...
}
The togglable={true} property makes the buttons toggle between selected and unselected styles when the user clicks them. We can ensure that only one of them is active at a time by controlling their selected property, setting it to true only for the currently selected range.
Instead of repeating the same code for each onClick callback, we can have a generic handleClick event handler, and bind it to different values:
// src/RangeButtonGroup.js

export default class RangeButtonGroup extends Component {
  constructor(props) {
    super(props);

    this.handleClickOneMonth = this.handleClick.bind(this, "1m");
    this.handleClickThreeMonths = this.handleClick.bind(this, "3m");
    this.handleClickSixMonths = this.handleClick.bind(this, "6m");
    this.handleClickOneYear = this.handleClick.bind(this, "1y");
    this.handleClickTwoYears = this.handleClick.bind(this, "2y");
    this.handleClickFiveYears = this.handleClick.bind(this, "5y");
  }

  // ...

  handleClick(range) {
    const { onClick } = this.props;
    onClick(range);
  }
}
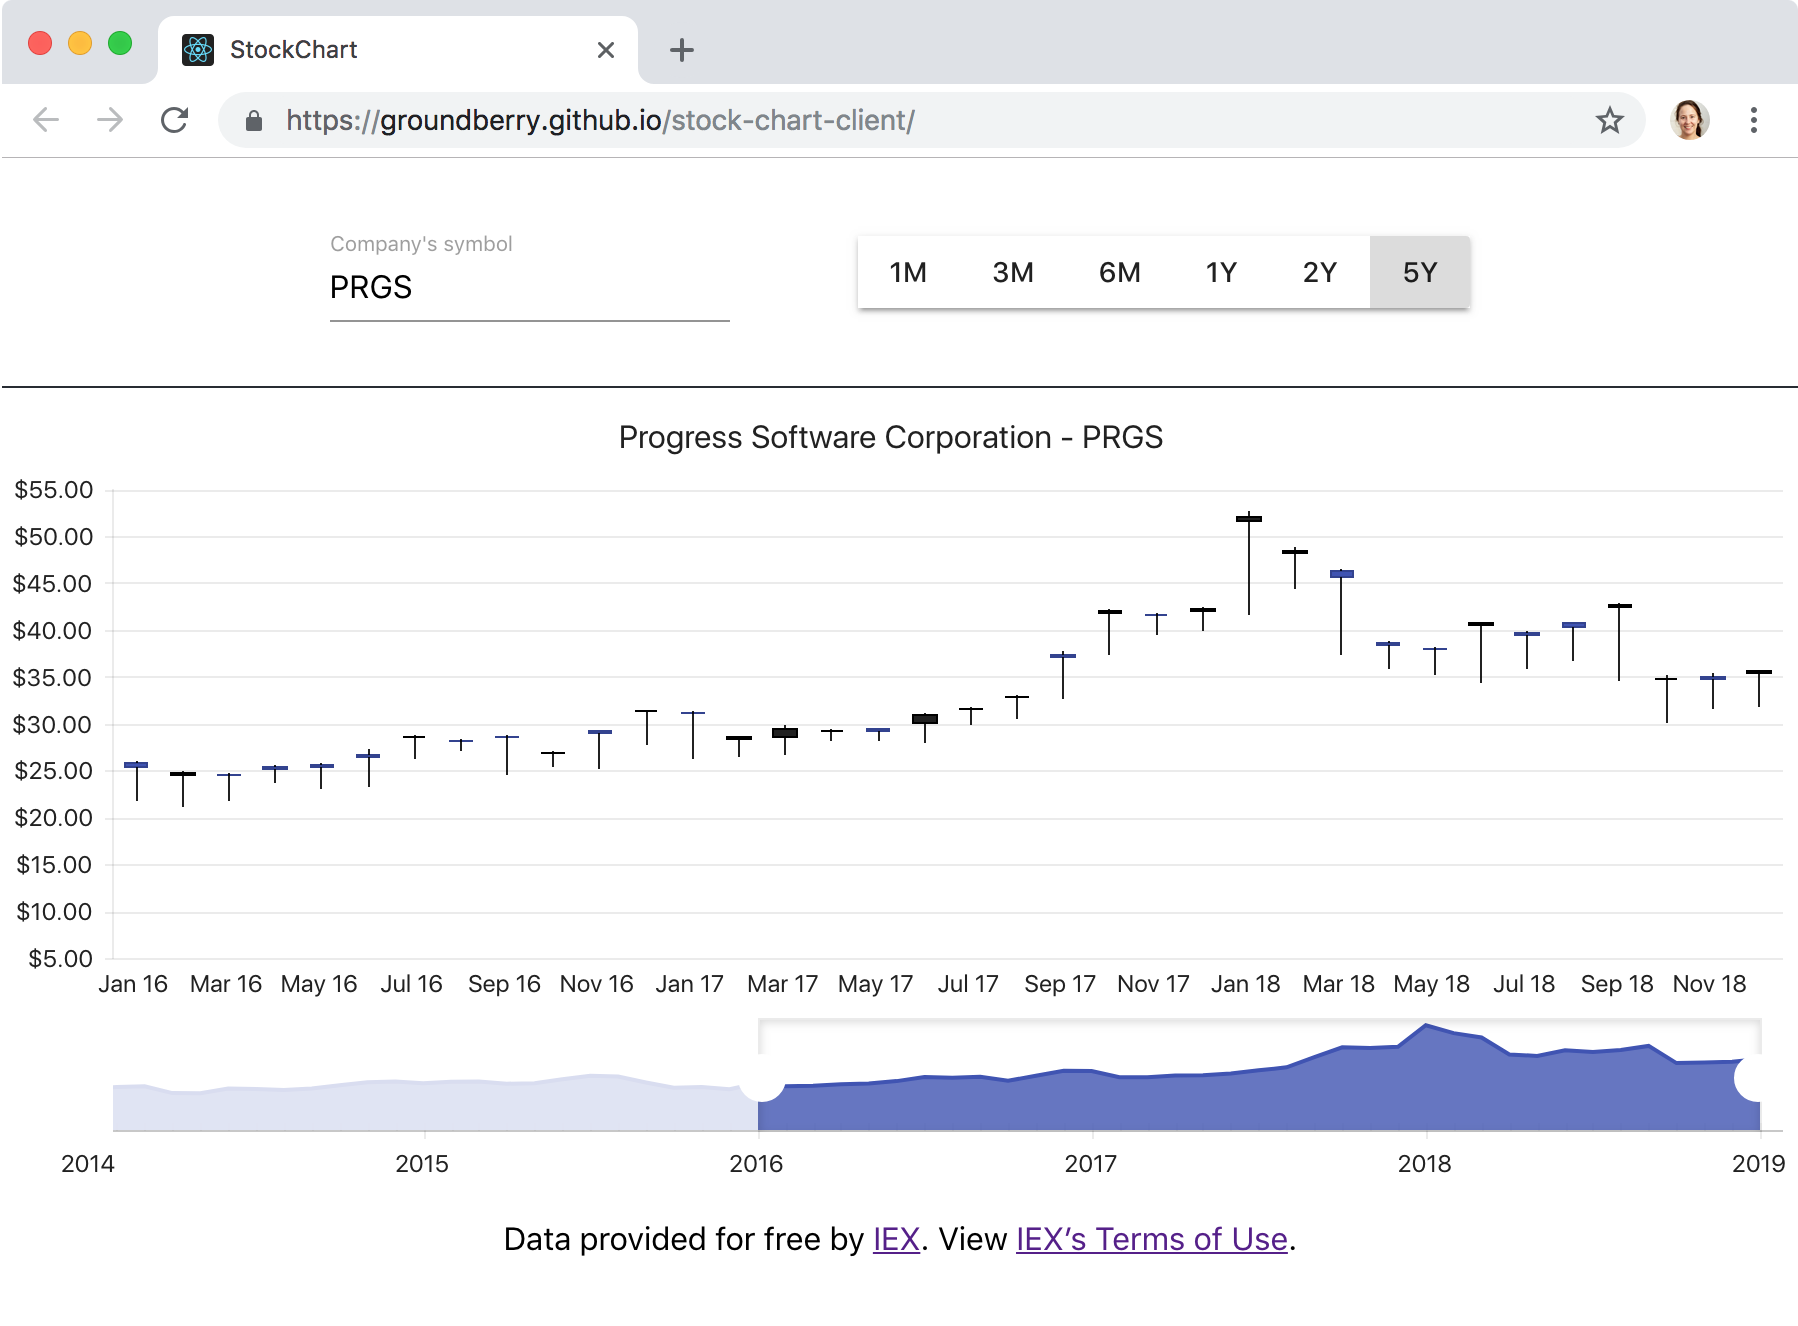
Rendering stock data with KendoReact StockChart
And finally we’ll render the stock data using KendoReact’s StockChart component. It’s a pretty complex component that expects certain other components as children. It’ll look something like this:
// src/CustomStockChart.js

import React from "react";
import {
  StockChart,
  ChartTitle,
  ChartSeries,
  ChartSeriesItem,
  ChartNavigator,
  ChartNavigatorSelect,
  ChartNavigatorSeries,
  ChartNavigatorSeriesItem
} from "@progress/kendo-react-charts";
import "hammerjs";

const CustomStockChart = props => {
  // ...

  return (
    <StockChart>
      <ChartTitle text={title} />
      <ChartSeries>
        <ChartSeriesItem
          data={massagedData}
          type="candlestick"
          openField="Open"
          closeField="Close"
          lowField="Low"
          highField="High"
          categoryField="Date"
        />
      </ChartSeries>
      <ChartNavigator>
        <ChartNavigatorSelect from={from} to={to} />
        <ChartNavigatorSeries>
          <ChartNavigatorSeriesItem
            data={massagedData}
            type="area"
            field="Close"
            categoryField="Date"
          />
        </ChartNavigatorSeries>
      </ChartNavigator>
    </StockChart>
  );
};

export default CustomStockChart;
The three main parts of the chart are:
ChartTitlewhich displays the title of the chart (d’uh).ChartSerieswhich displays the actual data.ChartNavigatorwhich allows you to change the range of data you want to view.
Massaging API data
The openField, closeField, lowField, highField and categoryField props of ChartSeriesItem, and the field and categoryField props of ChartNavigatorSeriesItem, need to be set to the appropriate attribute names in the data we pass to the data prop. So we’ll have to make sure it looks something like this:
[
  {
    "Date": "/Date(1390780800000)/",
    "Open": 32.6945,
    "Close": 31.9496,
    "Low": 31.9053,
    "High": 32.7122
  },
  {
    // ...
  }
]
(The Date field can be either a proper Date instance, or a string that looks like /Date(<timestamp>)/, whatever suits you best.)
We’ll take care of massaging the data we get from our API into something that matches the shape above in our appropriately named function massageData:
// src/utils.js

export function massageData(obj) {
  return {
    Date: new Date(obj.date),
    Open: obj.open,
    Close: obj.close,
    Low: obj.low,
    High: obj.high,
  };
}
We can then map over the API data with this function, to get what we want:
// src/StockChart.js

const CustomStockChart = props => {
  const { data } = props;
  const massagedData = data.map(massageData);

  return ( /* ... */ );
};
Calculating start and end dates
We also need to tell ChartNavigator the start and end dates we want to display. We can use the date of the first element in the array as start date, and the date of the last element as end date:
// src/StockChart.js

const CustomStockChart = props => {
  const { data } = props;
  const massagedData = data.map(massageData);

  const from = new Date(data[0].date);
  const to = new Date(data[data.length - 1].date);

  return ( /* ... */ );
};
Now we have everything we need to render the StockChart!
Fetching data from an external API
When the user enters a symbol or changes the date range, our App component will be notified, will update its state, and will then send a request to the IEX API to fetch the corresponding data:
// src/App.js

export default class App extends Component {
  // ...

  handleChangeSymbol(symbol) {
    this.setState({ symbol }, this.updateStockData);
  }

  handleClickRange(range) {
    this.setState({ range }, this.updateStockData);
  }

  async updateStockData() {
    const { symbol, range } = this.state;

    if (!symbol || !range) {
      return;
    }

    try {
      const stockData = await fetchData(symbol, range);
      this.setState({ stockData });
    } catch (err) {
      console.error("Could not fetch stock data:", err);
    }
  }
}
Our fetchData function uses the Fetch API to asynchronously request stock data from the IEX API.
fetch() takes one argument — the path to the resource we want to fetch — and returns a Promise containing a Response object. To extract the JSON body content from the response, we use the json() method. This call to json() returns another promise that resolves with the result of parsing the body text as JSON.
So our implementation looks like this:
// src/utils.js

export async function fetchData(symbol, range) {
  const url = `${serverUrl}?symbol=${symbol}&range=${range}`;

  const response = await fetch(url);
  return response.json();
}
(If you don’t want to deal with API calls and just want some sample stock data, check out the stock-data.json file referenced in the StockChart documentation.)
Now our frontend is complete. It is able to gather user input, use that input to request data from an API, and then render that data as a cool chart. 😎
However, if we tried to hit the IEX API directly from our frontend, we’d quickly encounter our friend CORS. Our frontend (http://localhost:3000) and the IEX API (https://api.iextrading.com/) live under different domains, so the browser blocks any request going from the former to the latter.
We’ll get around this problem by building a proxy with Node and Express in the next article.
This post was originally published at https://www.telerik.com/blogs/rendering-stock-market-data-with-kendoreact-stockchart.